Tuesday 12 March 2013

Freebie: 12 Large Bokeh Brushes

If you liked our Lomo Light Leaks, then you'll love these large bokeh brushes by SparkleStock. They make it easy for you to add light-leak-like bokeh to your photos and come in both 5000px Photoshop brushes and JPEG images for your convenience. Try them out!
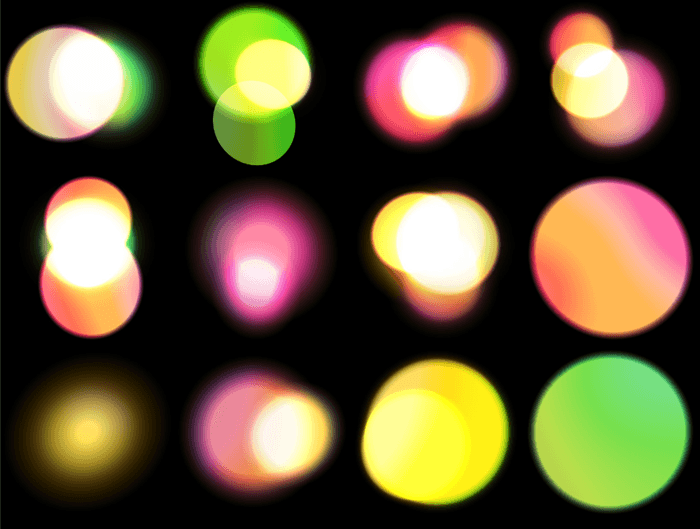
Bokeh Brush Preview

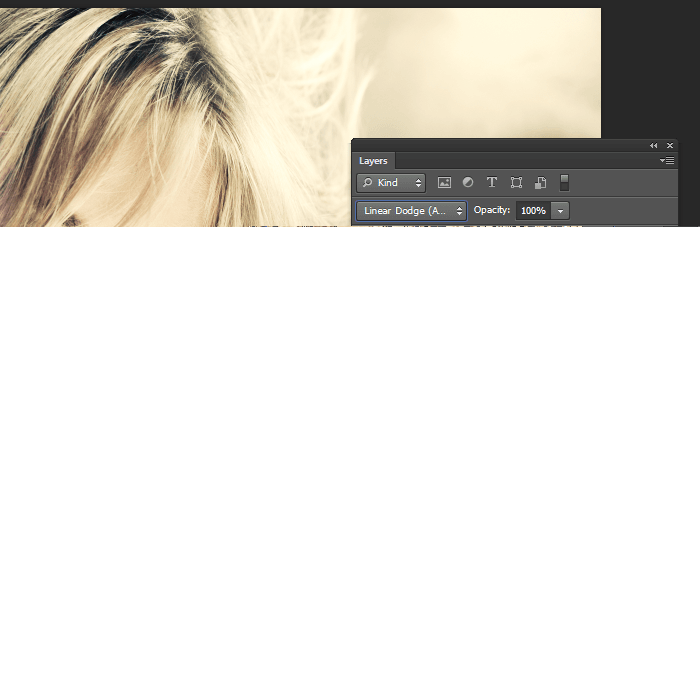
There are 12 color bokeh brushes. If you’re a SparkleStock member, you can pick from 18 bokeh brushes! They come in multiple sizes; 625, 1250, 2500, and 5000 pixels. In addition, you get them in pre-colored JPEG images to save you time. Drag and drop them into your document then set the blending mode to Screen or Linear Dodge – it’s that easy!3
Large Bokeh
We recommend using these bokeh brushes with photos that have some sort of retro photo effect applied. Here are some photo effect tutorials we recommend:
These bokeh brushes work great with portraits. Paint with your brush and layer set to linear dodge using different colors. Combine it with some color lookup filters (Layer > New Adjustment Layer > Color Lookup) to give it a photo retro effect. You can combine the Futurstic Bleak and Film Stock color lookups for the best results.
 by. David Yosia
Quick Tip: Erase Backgrounds Quickly With The Background Eraser Tool

Many people use complicated methods to erase backgrounds when they can do it much easier with the Background Eraser tool. It creates great results with its automatic edge detection and selection feathering. In this tutorial, you will learn how to use the background eraser tool to erase the sky and replace it with another from a set of realistic sky gradients.
clip_image003


Step 1: Chose an image to work with

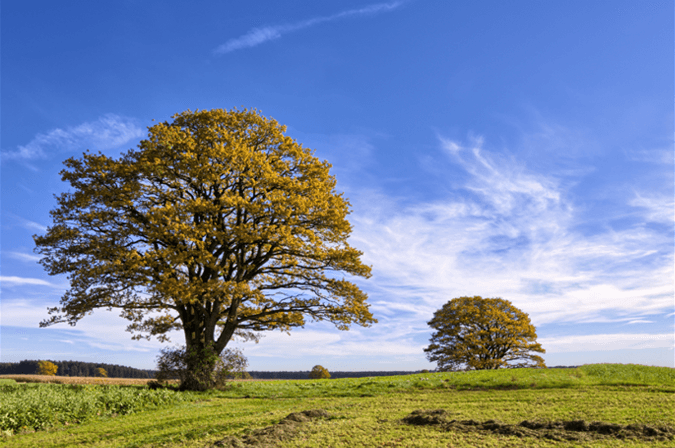
Open a photo that you want to extract a background from in Photoshop. In this tutorial I’m going to use a scene of two trees and a blue sky as background, but you can use the same techniques applied here to a variety of images and situations.
clip_image003

Step 2: How the tool works

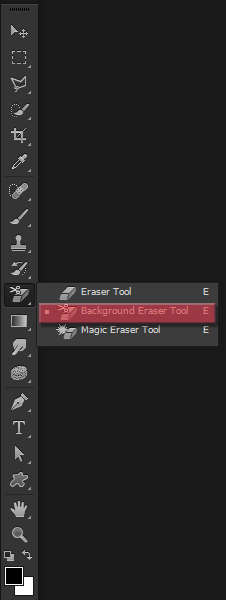
Even though the name says “Background” eraser, this tool can actually be used to erase a lot more than that, and it works more as a “Color” eraser rather than a “Background” eraser. So to start off let’s select the tool. You can use the shortcut Shift+E to cycle through the erasers panel, or you can click on its button on the left panel.
clip_image004
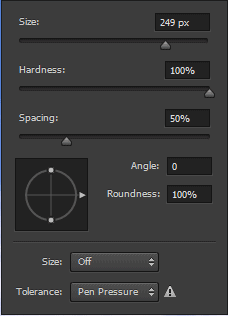
After selecting it, the options on your top panel will change, and your mouse will become a circle with a crosshair in the middle. The crosshair area is where we’re going to select the color that we want to erase, and everything else inside that circle that has that color will be erased. Right click anywhere in your image to open up the brush options for that tool.
clip_image005
Remember to always keep the hardness high because soft edges may leave background artifacts behind. Change the size of the brush as needed, and keep the spacing fairly low (1~50%) so it creates a smoothcontinually erasing line when you are using the tool.
clip_image006


In the top panel, chose the Sampling Once option, so we will only sample the color once and erase a big part of the image with it. Keep the Limits at Contiguous and the Tolerance at 50% for now.

Step 3: Start erasing

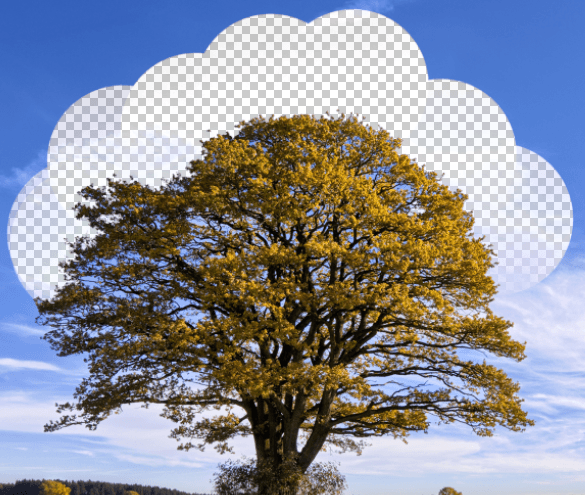
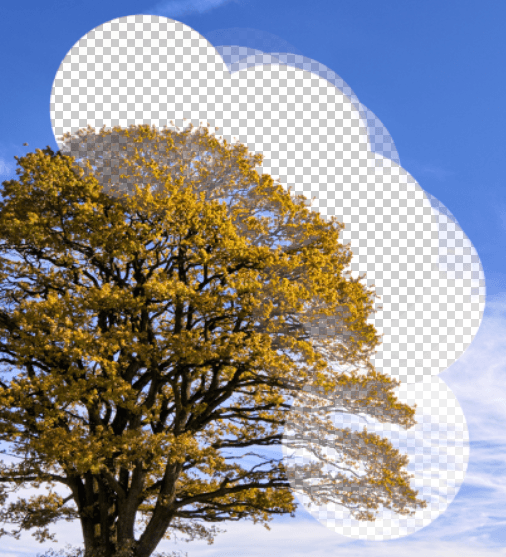
Click in a random part of the sky, hold the left mouse button, and drag the mouse around to erase.
clip_image007
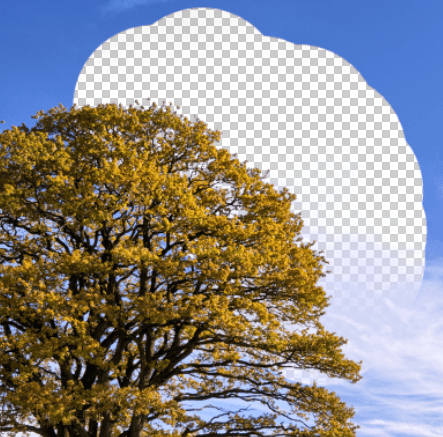
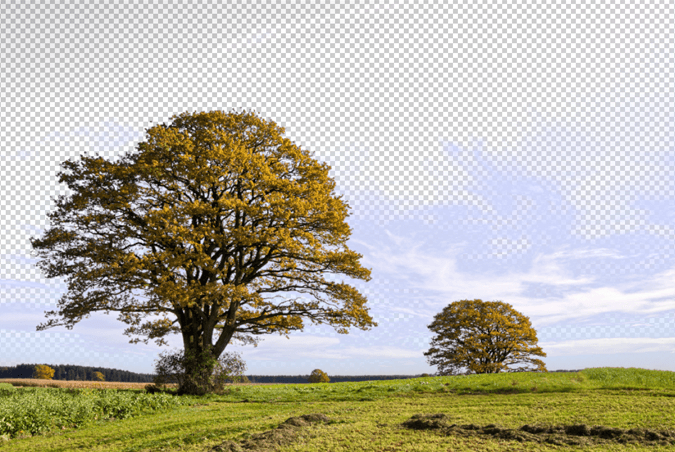
As you can see in the image above, we are not erasing the background between the leafs and branches, but that leads us to the “Limits” option of the Background Eraser Tool. Go to the top panel and change the Limit from Contiguous to Discontiguous. Now do the same thing we did before and let’s see what will be the result.
clip_image008
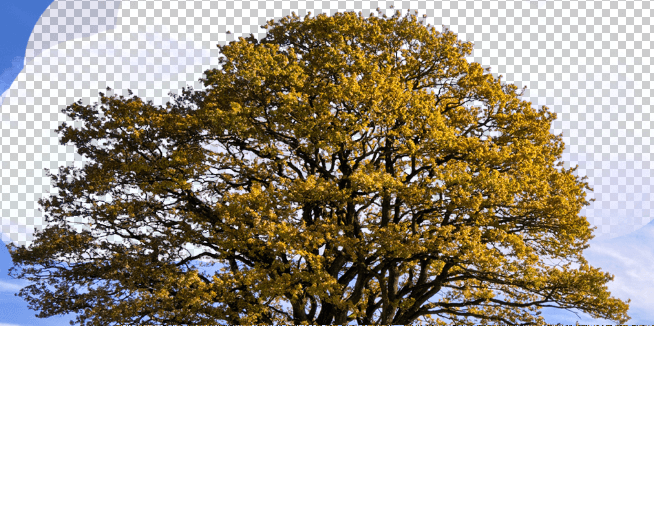
clip_image009clip_image009clip_image009As you can see, the Discontiguous option allow us to erase the background even in isolated areas, like in between the branches and leafs of our tree.

Step 4: A few more options

In my case, when I painted with the Tolerance at 50% (default), the ending result was pretty good, but don’t worry if something like this happens to you:
clip_image010
If something like that does happen to you, it means that the color from the background is too similar to your subject, so you have to lower your Tolerance levels. If the color from the background is quite different from your subject (like in my case) you can set the Tolerance to higher levels to obtain better results. With the right Tolerance level you should get results like this:
clip_image011

Step 5: More options!

If you tried changing the Tolerance levels but are still getting problems with the Background Eraser Tool erasing your subject, turn on the Protect Foreground Color option.
clip_image012
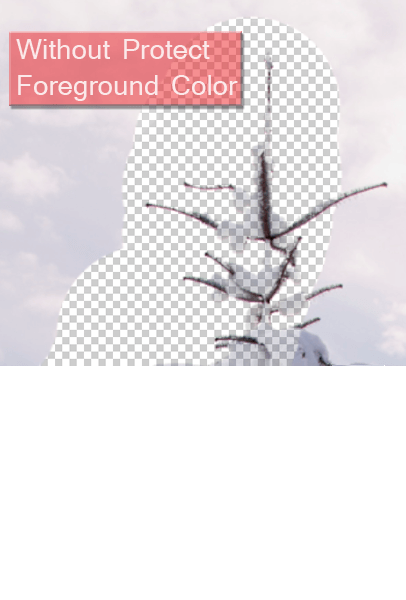
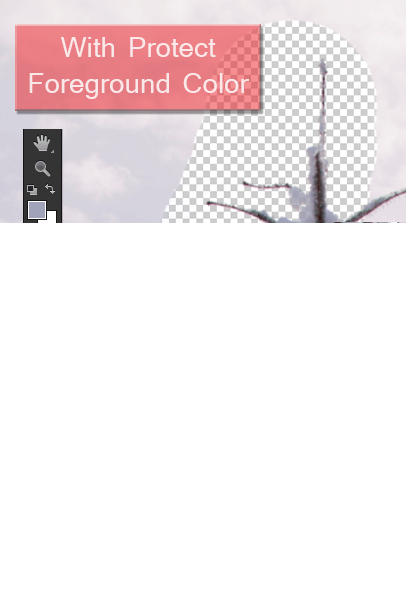
This allows you to sample a foreground color (hold Alt/Opt to sample a color from your image) that Photoshop will not erase when using the Background Eraser Tool. Here’s an example of how this option works:
clip_image013
clip_image014

Step 6: Different Background colors

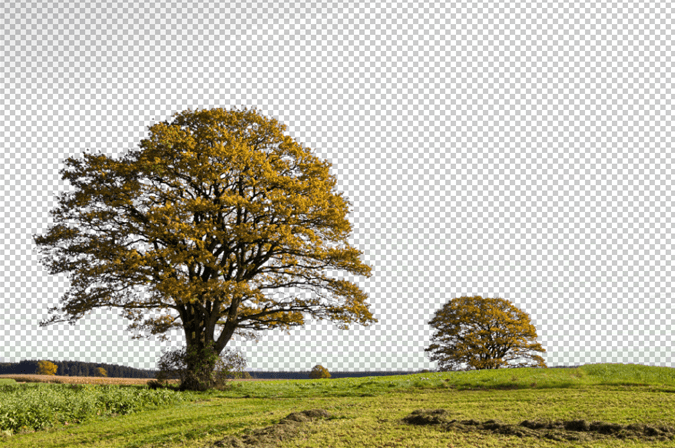
After you used the Background Eraser Tool in your whole image for one color, you should have something like this:
clip_image015
Even though my background was pretty much all blue, it has different tones of blue, and even some whites in it. To deal with that, you just have to sample a new color and repeat the process all over. You could also select the “Sampling Continous” option in the top panel:
clip_image016
But I don’t recommend that because if you come too close to your subject (in this case the trees) you may sample their color by accident and end up erasing parts of the image that you didn’t wanted to erase. So just aim the crosshair of our mouse into another color and repeat the same process until our image is fully cleared.
clip_image017

Step 7: Final step

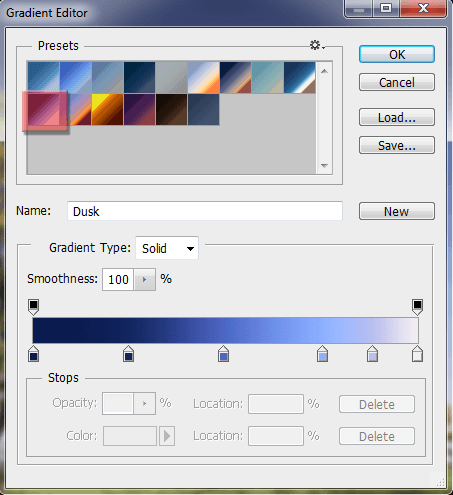
After erasing the background you have two choices, you can either select the subject you just extracted and use it in a photo manipulation project, or you could replace the background you just deleted with something new to create a different image (that’s what we’re going to do). Download the sky gradient pack and chose the best one for your image. I chose to replace my old background with this blue sky:
clip_image018
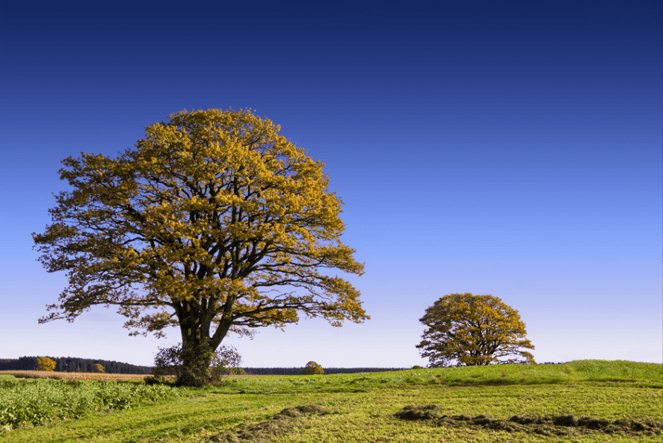
And this is the result:
clip_image019

Final Results

clip_image003


by. David Yosia
Quick Tip: Easily Create Seamless Photo Textures You can Tile

Wonder how people create those tileable photo textures? Whether you're using it to create desktop wallpapers or website backgrounds, you'll find it easy to do with this Photoshop tutorial. Read this tutorial to learn how you can manipulate your photo to make it seamless/tileable.

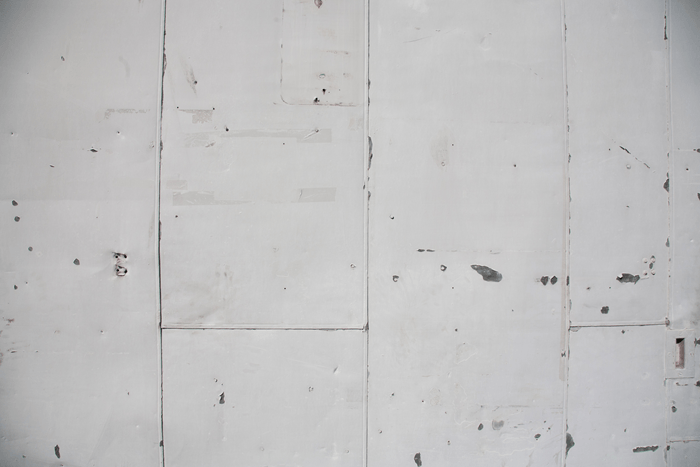
Metal Panel Texture


Step 1

Open a photo that you want to turn into a texture. The easiest photos to use are the ones with the least lines, lens distortion, tilt, and differentiating colors. Here’s the photo that we’ll be using for this tutorial.Download the image and use it to follow this tutorial.
Metal Panel Texture

Step 2

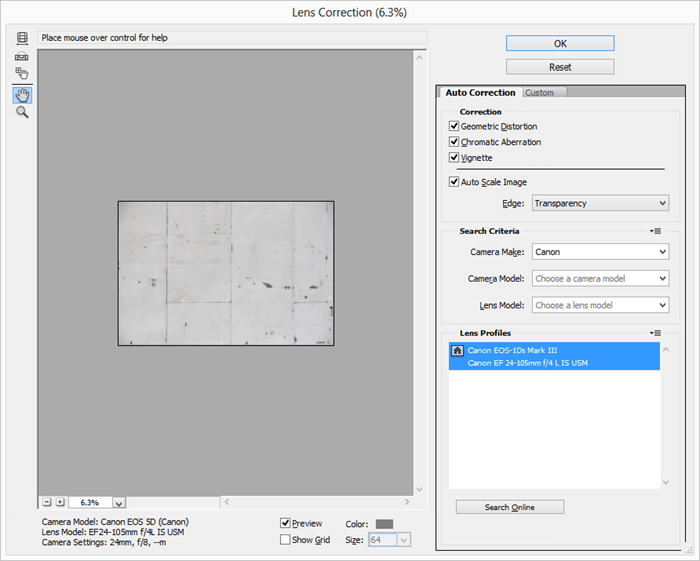
First, we need to get rid of the barrel distortion and vignette. You can do this quickly and easily with the Lens Correction tool (Filter > Lens Correction). Your photo should have its original camera metadata for this to work its best. In the Lens Correction tool, Photoshop should auto-detect the settings and apply the correction for you. If it doesn’t work out, go into the Custom tab and adjust the settings manually.
Lens Correction
Here’s our image with the lens correction applied. It’s not perfect, but it’s good enough – we can fix the settings later.
Metal Panel Texture
Step 3
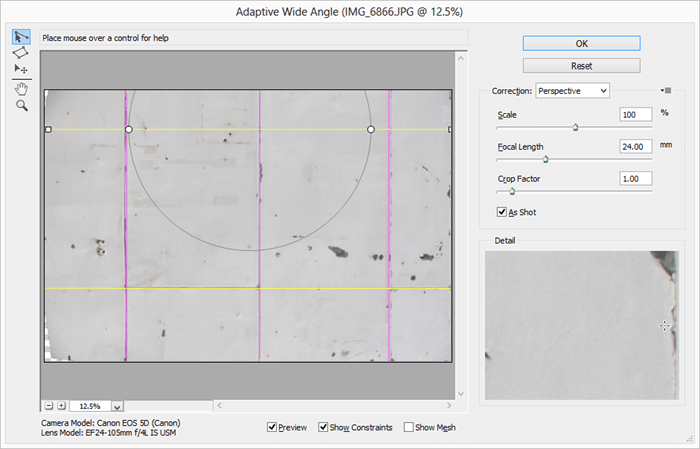
If your texture has lines that stretches from one side to the other, like the vertical lines in our photo, you’ll need to use the Adaptive Wide Angle filter to align them so that they are perfectly horizontal/vertical. In the dropdown menu, select Perspective as the correction method. While holding down the Shift key, draw correction lines over any lines in the photos. Ensure that they match perfectly. Click OK when you’re done.

Step 4

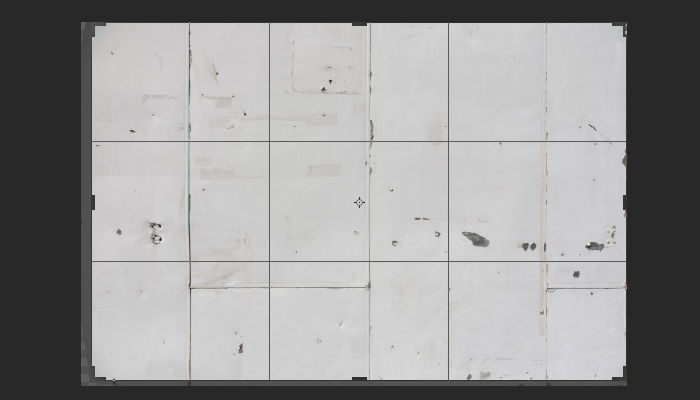
Select the Crop tool. In the options bar, checkmark the “Delete Cropped Pixels” option.
Crop the transparent areas out of the frame.

Step 5

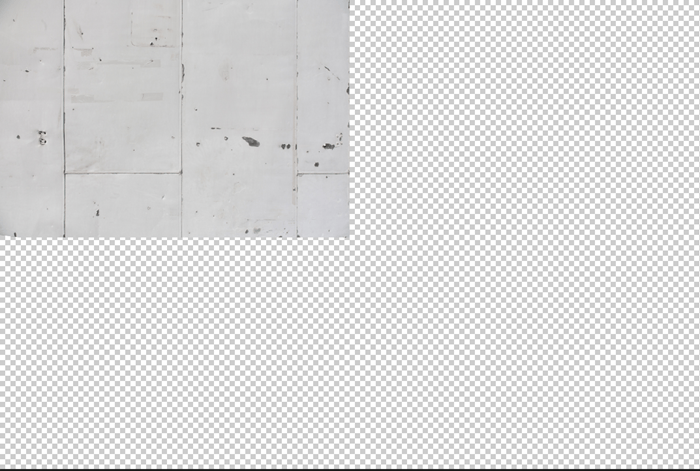
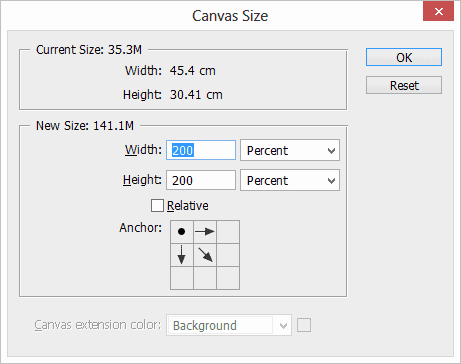
Go to Image > Canvas Size. Set the width and height to 200 percent, anchor to top-right, then click OK.
You should now have a lot of area to work with. We’ll be extending the texture to cover these areas which will make your image dimensions around 4x larger.

Step 6

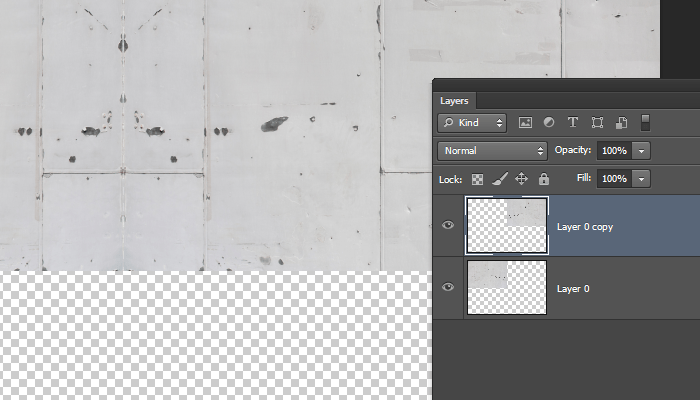
Duplicate the layer (Ctrl/Cmd+J) then go to Edit > Transform > Flip Horizontal. Use the Move tool to move the image to the top-right corner.
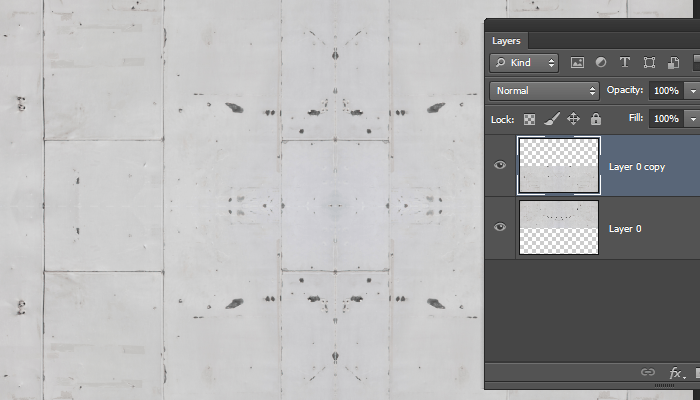
Merge the layers (Ctrl/Cmd+E) then duplicate the merged layers (Ctrl/Cmd+J). With the new layer selected, go to Edit > Transform > Flip Vertical. Use the Move tool to move the image to the bottom edge. Press Ctrl/Cmd+E to merge the two layers.
by.David Yosia


How to Retouch and Airbrush Skin in Photoshop


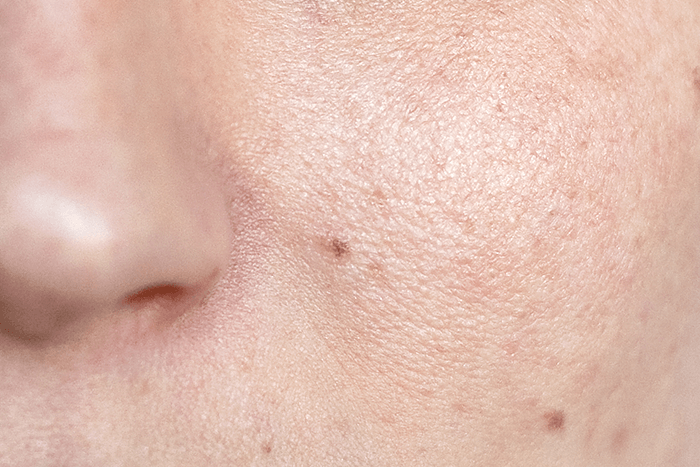
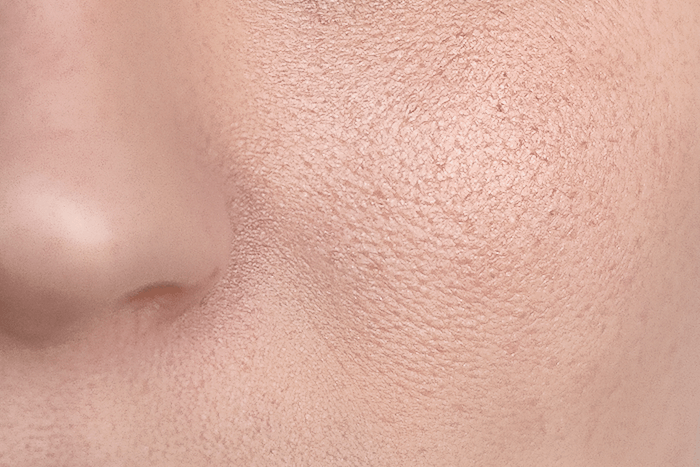
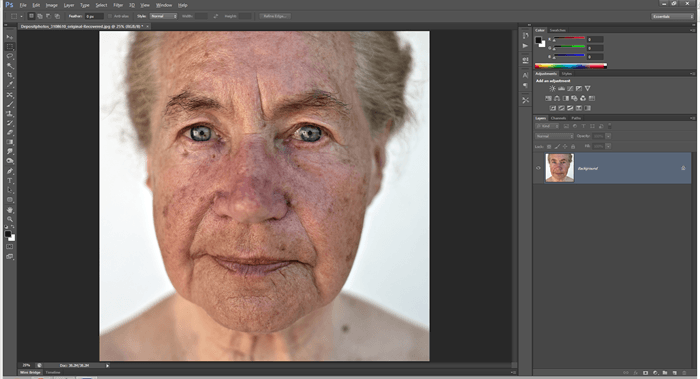
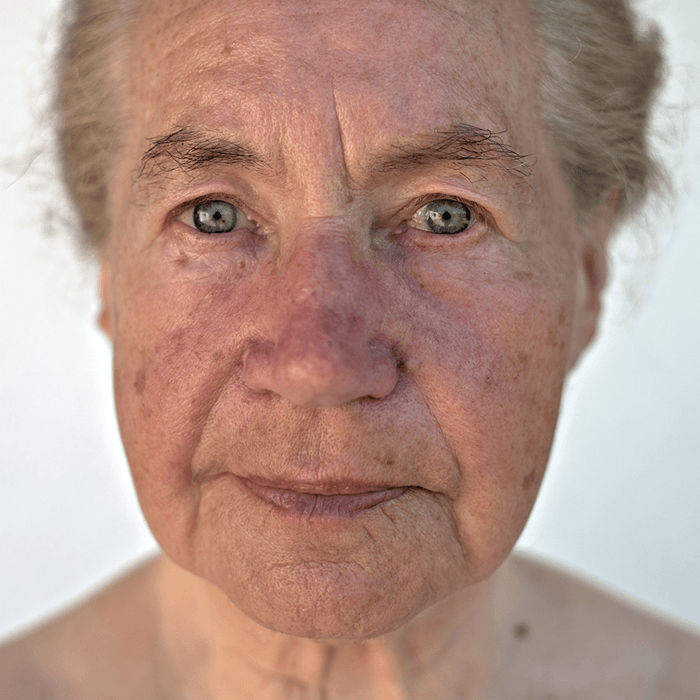
Learn how to retouch skin professionally in Photoshop without making it look fake or blurry. In this Photoshop tutorial, you will learn how to reduce wrinkles and blemishes, airbrush skin naturally, dodge and burn, and more using all non-destructive editing techniques. Once you learn this, you can make everything from natural skin improvements to glamorous airbrushed skin used in advertising. To follow this tutorial, you’ll need Photoshop CS2 or newer.


Preview of Final Results


BeforeAfter
BEFORE                                     AFTER


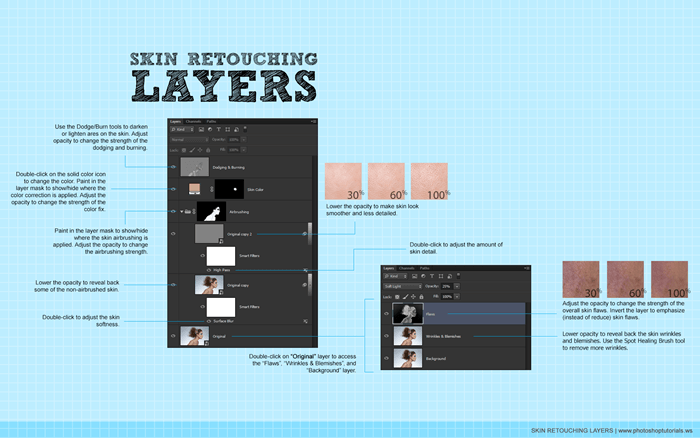
Skin Retouching Layers Diagram


Step 1


Step 2

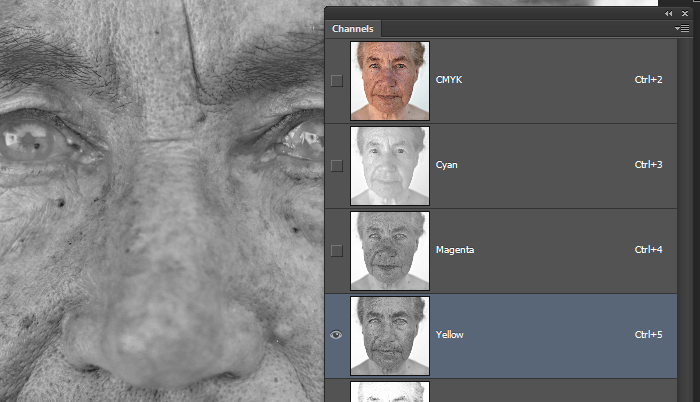
To begin, we’re going to start with a subtle skin retouching method that uses the Yellow channel to reduce skin flaws. Go to Image > Mode > CMYK. In the Channels panel, click on the Yellow channel. Copy this channel by pressing Ctrl/Cmd+A then Ctrl/Cmd+C.  

Step 3

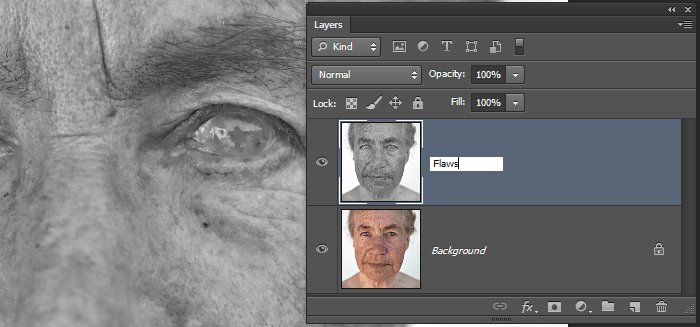
Undo the steps by pressing Ctrl+Shift+Z or Cmd+Option+Z on Macs until you’re back in RGB mode. Press Ctrl/Cmd+V to paste and the Yellow channel will appear as a new layer. Name this layer “Flaws”.

Step 4

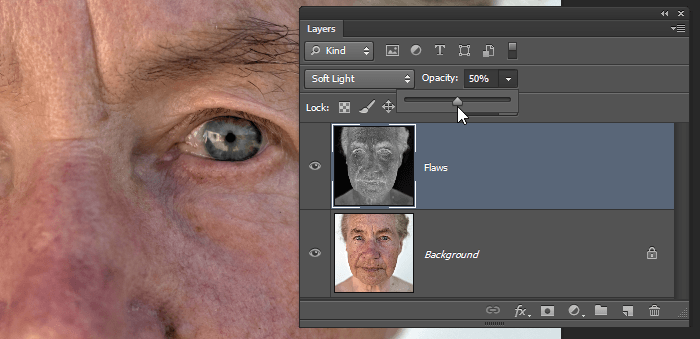
Invert the layer by pressing Ctrl/Cmd+I then change the blending mode to Soft Light. Reduce the opacity until you get the results that you like. You can add a layer mask and erase the areas around the face if it is affecting the color/details of the surrounding areas. We don’t need to do this for our photo because the layer doesn’t affect the surrounding areas in any noticeable way.
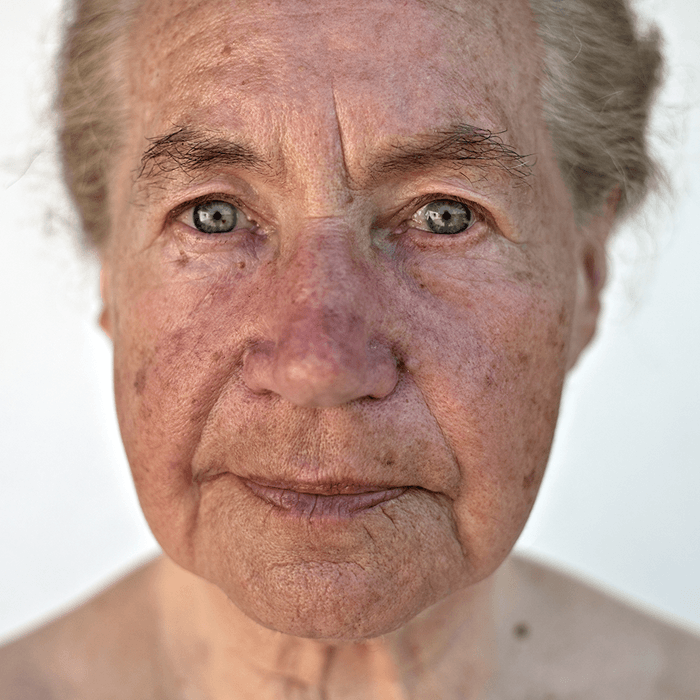
Here’s the before and after of using the yellow channel to reduce skin flaws.
before
after

Step 5

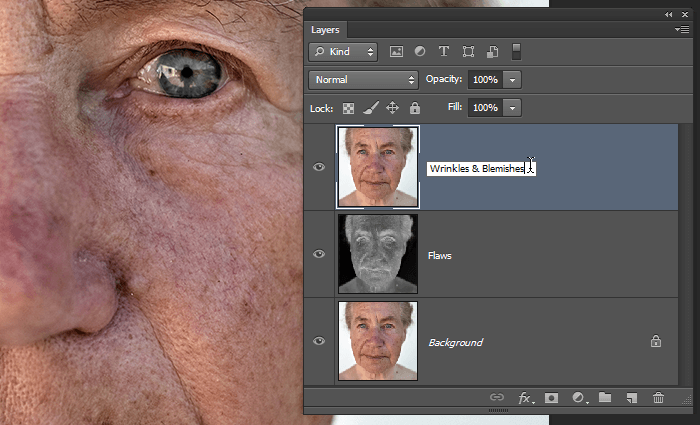
Before we do any sort of airbrushing on the skin, we’re going to use the Spot Healing Brush to reduce wrinkles and blemishes. Select the Background layer then duplicate it by pressing Ctrl/Cmd+J. Move this layer to the top then rename it to “Wrinkles & Blemishes”.

Step 6

Use the Spot Healing Brush to erase the wrinkles and blemishes. Reduce the opacity of the layer to bring back some of the wrinkles and blemishes then position this layer below the Flaws layer.
http://www.youtube.com/watch?feature=player_embedded&v=E3S6seDDEYI
<iframe width="640" height="360" src="http://www.youtube.com/embed/E3S6seDDEYI?feature=player_embedded" frameborder="0" allowfullscreen></iframe>
We’re pretty much done and as you can see in this before and after preview, the skin looks a lot better than before.
Before
Step 7
If you’re happy with the results, you can stop here. But if you want to continue with some more dramatic skin retouching techniques, follow the rest of the tutorial to learn how to airbrush skin and reduce discoloration in the skin.
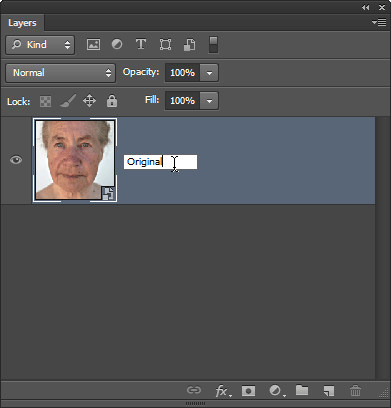
Before we proceed, convert all your layers into a single Smart Object. To do this, Hold Ctrl/Cmd and select all the layers. Right-click on the layers then choose “Convert to Smart Object”. This will save you time by letting you make changes to the faces at a later time without having to undo and redo everything. Rename this layer to Original.

Step 8

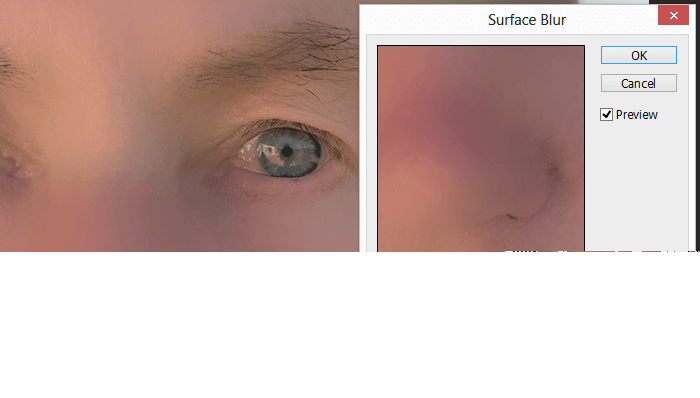
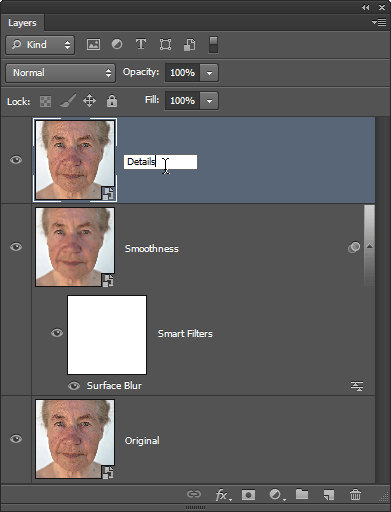
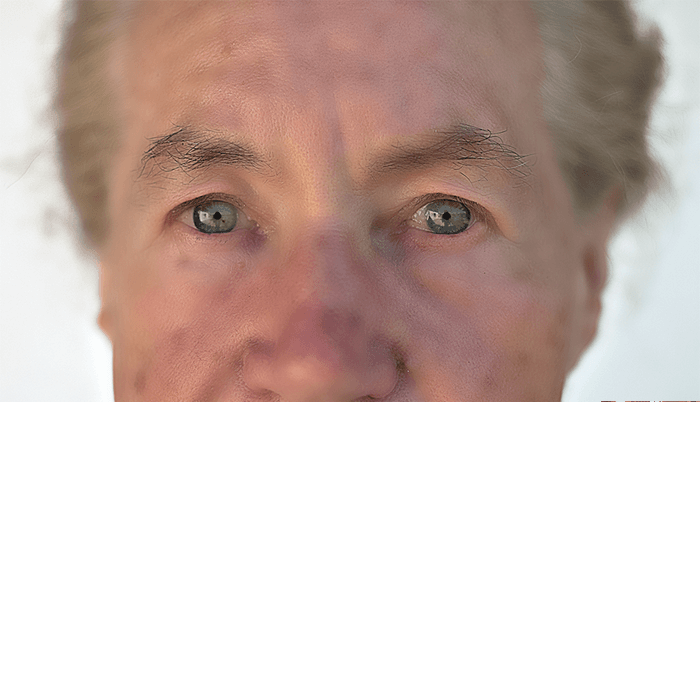
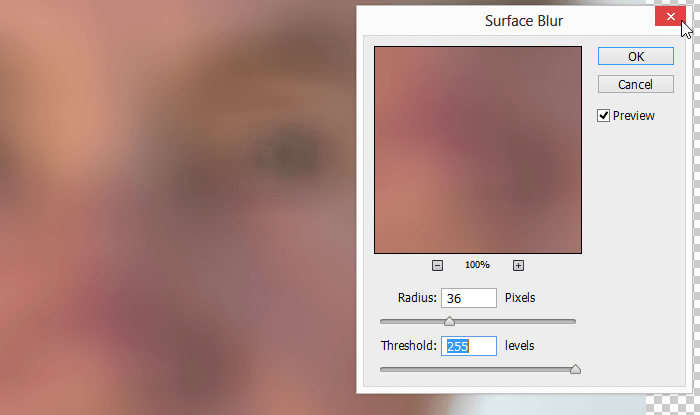
Duplicate the layer then rename it to “Smoothness”. With the Smoothness layer selected, go to Filter > Blur > Surface Blur. Set the Threshold to 255 levels then adjust the radius so that you can barely make out the face.
Reduce the Threshold until you can just start to make out the details. The skin should still be very blurry. Click OK to apply the filter.

Step 9

Duplicate the Original layer then move it to the top. Name this layer “Details”. This layer will be used to restore the details lost in the Smoothness layer.

Step 10

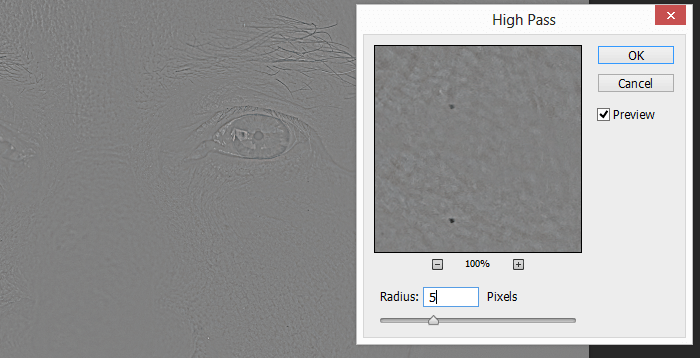
Go to Filter > Other > High Pass. Adjust the radius setting until you can barely bring back the details.

Step 11

Change the blending mode of this layer to Linear Light. The skin looks cleaner, but it looks overly airbrushed and has a fake plastic look to it. This may work well for younger subjects with fair skin, but for skin with more complexions, you’ll have to reduce this for it to look realistic. Here’s what the airbrushing looks like before and after.
After


by.David Yosia